How To Setup Your HostedHooks Instance May 2021 · ian
Introduction
This article will be a walkthrough of how to setup your HostedHooks instance and prepare it for the API integration.
Setup
Before we get started you will need to signup for a HostedHooks account so you can receive your API token. This API token is required for every API call.
If you've already signed up, you can grab the API key in your settings (see the screenshot below)

If you haven't signed up yet, you can do so by joining the waitlist here.
Create Your App
Within HostedHooks you will need to setup the App that you are going to be sending webhooks from. This is also the same app that your subscribers will be subscribing to. Let's walk through setting that up.
Once you are logged in, click the "Setup New App" button on your dashboard.

Go ahead and put a name in for your app.

Once that is created you will be redirected to your App page.
Setup Your App
Now that you have created your app, we need to set it up so subscribers can receive webhooks.
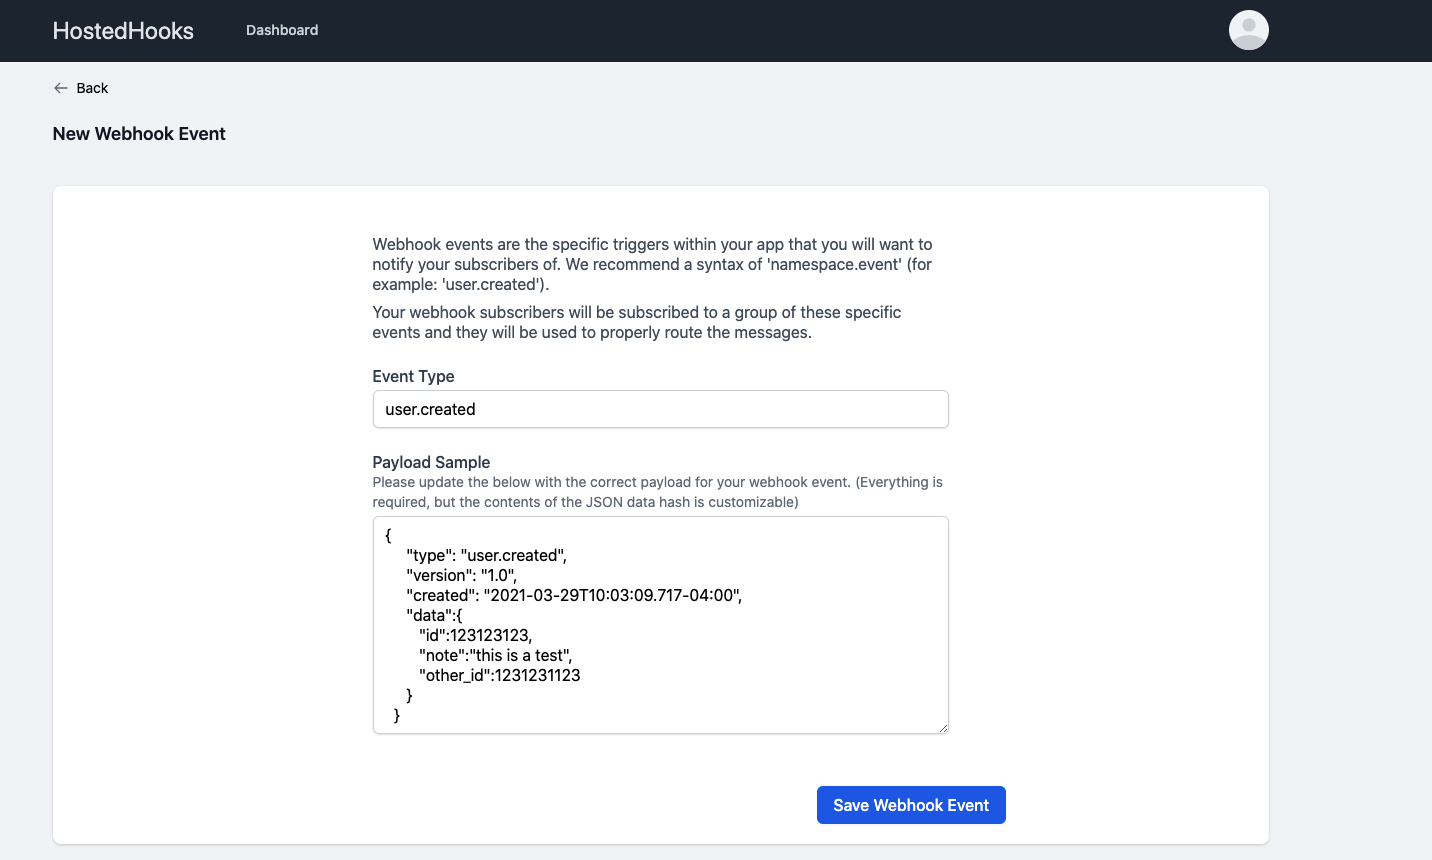
First we need to create the events that we want to send webhooks for. These events are things like a user being created or a shipment being delivered. Go ahead and click 'Add More Events'

Here you will need to setup the event name that you want your subscribers to subcribe to.
Below the event name is a sample payload that you should edit to fit your event. This payload will be used to simulate events when your subscribers are integrating. The only parts that are are customizable are the 'type' and the 'data' JSON object, please update those accordingly.

Once you are done hit save and you'll be taken back to your app page.
Setup Subscriber
Now that you have created an App and an Event for that app, you now need subscribers to send your webhook event to. The first step of that is setting up a subscriber organization. You can do that by clicking the 'Add A Subscriber' button.

Add the Subscriber name and hit save.
Setup Endpoint
Once that Subscriber has been created, you will have two options. You can either create an endpoint for this subscriber or you can invite a user from your subscriber's organization to let them setup the endpoint themself. For the sake of this demo, we are going to setup the endpoint for the Subscriber. Get started by clicking 'Setup New Endpoint'.

Within the endpoint there are a few attributes that need to be set:
- URL - This is the destination URL on your subscriber's application ( must be able to receive POST requests and return a 200 )
- Version - This allows you to send non breaking updates to your endpoints
- Status - This lets you turn the endpoint on or off to start and stop receiving messages
Subscribe Endpoint to Webhook Event
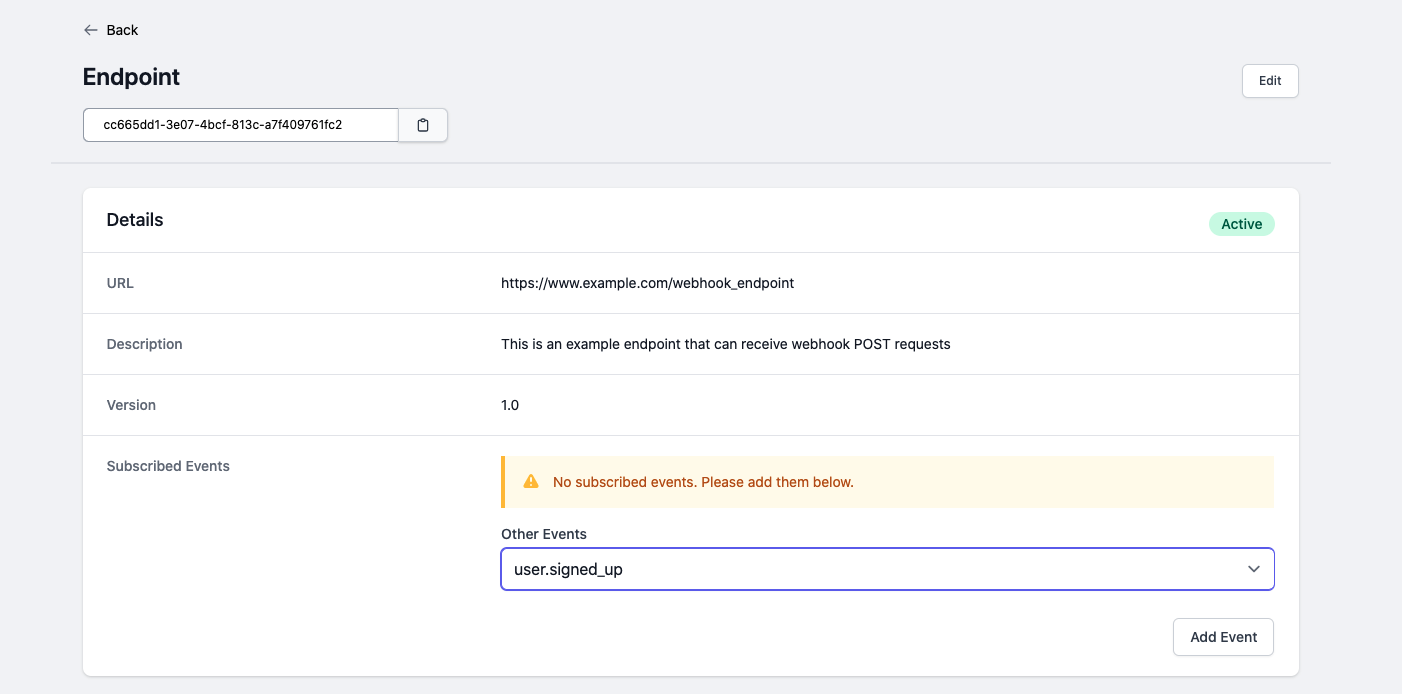
Once the endpoint is created, click on 'View' which will take you to the endpoint screen. The last thing to be done is to subscribe your endpoint to the webhook event you created above. Choose the event from the dropdown and click 'Add Event'.

Everything is setup to start sending webhook messages for that event. If you want to add more events, endpoints or subscribers just review the steps above and repeat.
Next up you will need to integrate your codebase with the HostedHooks API to start sending Messages when events are triggered.
We will be releasing documentation and walk-throughs for a bunch of different languages. Sign up for our newsletter to receive product and documentation updates.
Try HostedHooks Free
Getting started is easy! No credit card required.